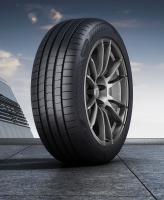

Test Charts / Auto Bild
2023 Summer Tire Market Overview
Compare each discipline in the tested size. See the measured result, position and gap to the best tire, then read the verdict for the trade-offs behind the finishing order.
- Tested size
- 225/45 R18
- Tires tested
- 48
- Disciplines
- 2

Read the measurements, not just the rank
Lower is better for braking distances and lap times; higher is better for subjective scores and aquaplaning speed. Bars start at zero. Read the gap alongside the position: adjacent tires can be separated by very different margins.
Positions and gaps always refer to the full test field within each group. Selecting tires does not recalculate rankings or change the best-in-test benchmark.
Focus on your tires
Select tires to highlight them throughout the charts.
Positions and gaps always refer to the full test field within each group. Selecting tires does not recalculate rankings or change the best-in-test benchmark.
Dry
1Dry Braking
Dry braking in feet (62 - 0 mph)
Lower is better ↓| Position / Tire | Result | Gap to best | Residual speed |
|---|---|---|---|
| 109 ft | Best | 0 mph | |
| 109 ft | 0 ft | 4 mph | |
| 110 ft | +1 ft | 8 mph | |
| 111 ft | +2 ft | 10 mph | |
| 111 ft | +2 ft | 10 mph | |
| 112 ft | +3 ft | 12 mph | |
| 112 ft | +3 ft | 13 mph | |
| 112 ft | +3 ft | 13 mph | |
| 112 ft | +3 ft | 13 mph | |
| 113 ft | +4 ft | 14 mph | |
| 113 ft | +4 ft | 15 mph | |
| 114 ft | +5 ft | 16 mph | |
| 114 ft | +5 ft | 17 mph | |
| 115 ft | +6 ft | 18 mph | |
| 115 ft | +6 ft | 19 mph | |
| 116 ft | +7 ft | 20 mph | |
| 116 ft | +7 ft | 20 mph | |
| 116 ft | +7 ft | 20 mph | |
| 117 ft | +8 ft | 21 mph | |
| 117 ft | +8 ft | 21 mph | |
| 117 ft | +8 ft | 22 mph | |
| 118 ft | +9 ft | 22 mph | |
| 118 ft | +9 ft | 22 mph | |
| 118 ft | +9 ft | 22 mph | |
| 118 ft | +9 ft | 22 mph | |
| 118 ft | +9 ft | 22 mph | |
| 118 ft | +9 ft | 23 mph | |
| 119 ft | +10 ft | 23 mph | |
| 119 ft | +10 ft | 23 mph | |
| 120 ft | +11 ft | 24 mph | |
| 120 ft | +11 ft | 24 mph | |
| 121 ft | +12 ft | 25 mph | |
32Avon ZV7 |
121 ft | +12 ft | 25 mph |
| 122 ft | +13 ft | 26 mph | |
| 122 ft | +13 ft | 26 mph | |
| 122 ft | +13 ft | 27 mph | |
| 123 ft | +14 ft | 27 mph | |
| 124 ft | +15 ft | 28 mph | |
| 124 ft | +15 ft | 28 mph | |
| 125 ft | +16 ft | 29 mph | |
| 125 ft | +16 ft | 29 mph | |
| 126 ft | +17 ft | 29 mph | |
| 127 ft | +18 ft | 30 mph | |
| 127 ft | +18 ft | 30 mph | |
| 128 ft | +19 ft | 31 mph | |
| 129 ft | +20 ft | 31 mph | |
| 131 ft | +22 ft | 33 mph | |
| 132 ft | +23 ft | 34 mph |
The difference between best and worst was 21.4% (23 ft ≈ 1.6 Car Lengths). From 80 mph, the Triangle SporteX TH201 would still be travelling at 34 mph when the Goodyear Eagle F1 Asymmetric 6 had stopped.
Residual speed is calculated from the measured braking distances, assuming constant deceleration; it is not a separate measurement.

Wet
1Wet Braking
Wet braking in feet (50 - 0 mph)
Lower is better ↓| Position / Tire | Result | Gap to best | Residual speed |
|---|---|---|---|
| 81 ft | Best | 0 mph | |
| 82 ft | +1 ft | 5 mph | |
| 83 ft | +2 ft | 11 mph | |
| 83 ft | +2 ft | 12 mph | |
| 83 ft | +2 ft | 12 mph | |
| 85 ft | +4 ft | 16 mph | |
| 85 ft | +4 ft | 17 mph | |
| 87 ft | +6 ft | 20 mph | |
| 87 ft | +6 ft | 21 mph | |
| 88 ft | +7 ft | 21 mph | |
| 88 ft | +7 ft | 22 mph | |
| 89 ft | +8 ft | 23 mph | |
| 89 ft | +8 ft | 23 mph | |
| 89 ft | +8 ft | 24 mph | |
| 90 ft | +9 ft | 24 mph | |
| 90 ft | +9 ft | 25 mph | |
| 91 ft | +10 ft | 25 mph | |
| 91 ft | +10 ft | 26 mph | |
| 92 ft | +11 ft | 27 mph | |
19Avon ZV7 |
92 ft | +11 ft | 27 mph |
| 92 ft | +11 ft | 27 mph | |
| 93 ft | +12 ft | 28 mph | |
| 95 ft | +14 ft | 30 mph | |
| 95 ft | +14 ft | 30 mph | |
| 95 ft | +14 ft | 30 mph | |
| 96 ft | +15 ft | 31 mph | |
| 97 ft | +16 ft | 32 mph | |
| 97 ft | +16 ft | 32 mph | |
| 97 ft | +16 ft | 32 mph | |
| 98 ft | +17 ft | 33 mph | |
| 98 ft | +17 ft | 33 mph | |
| 100 ft | +19 ft | 34 mph | |
| 100 ft | +19 ft | 35 mph | |
| 101 ft | +20 ft | 36 mph | |
| 102 ft | +21 ft | 36 mph | |
| 103 ft | +22 ft | 36 mph | |
| 103 ft | +22 ft | 36 mph | |
| 103 ft | +22 ft | 37 mph | |
| 103 ft | +22 ft | 37 mph | |
| 104 ft | +23 ft | 37 mph | |
| 108 ft | +27 ft | 40 mph | |
| 108 ft | +27 ft | 40 mph | |
| 109 ft | +28 ft | 40 mph | |
| 109 ft | +28 ft | 40 mph | |
| 110 ft | +29 ft | 41 mph | |
| 110 ft | +29 ft | 41 mph | |
| 130 ft | +49 ft | 49 mph | |
| 132 ft | +51 ft | 50 mph |
The difference between best and worst was 62.5% (51 ft ≈ 3.4 Car Lengths). From 80 mph, the Zeta Alventi would still be travelling at 50 mph when the Hankook Ventus S1 evo 3 had stopped.
Residual speed is calculated from the measured braking distances, assuming constant deceleration; it is not a separate measurement.
Test setup & methodology
The test setting, the conditions recorded and how the results contribute to the score.
Recorded test conditions
Recorded test conditions
- Dry Braking
- 62.1 → 0.0 mph
- Wet Braking
- 49.7 → 0.0 mph
More tire tests
Cross-check this test
Where these tires were tested again, and how the verdict held up.
2026 Summer Braking Super Tire Test - How do 52 Tires Perform in Wet and Dry Braking?
245/45 R1950 tires tested
21 of these 48 tires tested again
2025 Summer Tire Test Shootout
225/40 R1852 tires tested
21 of these 48 tires tested again
2023 AutoBild UHP Summer Tire Test
225/45 R1820 tires tested
20 of these 48 tires tested again