

Test Charts / Auto Bild
2019 Auto Bild Summer Tire Test
Compare each discipline in the tested size. See the measured result, position and gap to the best tire, then read the verdict for the trade-offs behind the finishing order.
- Tested size
- 225/45 R17
- Tires tested
- 20
- Disciplines
- 10

Read the measurements, not just the rank
Lower is better for braking distances and lap times; higher is better for subjective scores and aquaplaning speed. Bars start at zero. Read the gap alongside the position: adjacent tires can be separated by very different margins.
Positions and gaps always refer to the full test field within each group. Selecting tires does not recalculate rankings or change the best-in-test benchmark.
Focus on your tires
Select tires to highlight them throughout the charts.
Positions and gaps always refer to the full test field within each group. Selecting tires does not recalculate rankings or change the best-in-test benchmark.
Dry
2Dry Braking
Dry braking in feet
Lower is better ↓| Position / Tire | Result | Gap to best |
|---|---|---|
| 112 ft | Best | |
| 114 ft | +2 ft | |
| 115 ft | +3 ft | |
| 115 ft | +3 ft | |
| 115 ft | +3 ft | |
| 115 ft | +3 ft | |
| 115 ft | +3 ft | |
| 115 ft | +3 ft | |
| 115 ft | +3 ft | |
| 116 ft | +4 ft | |
| 116 ft | +4 ft | |
| 117 ft | +5 ft | |
| 117 ft | +5 ft | |
| 117 ft | +5 ft | |
| 118 ft | +6 ft | |
| 118 ft | +6 ft | |
| 119 ft | +7 ft | |
| 119 ft | +7 ft | |
| 122 ft | +10 ft | |
| 122 ft | +10 ft |
The difference between best and worst was 8.5% (10 ft ≈ 0.6 Car Lengths).
Dry Handling
Dry Handling Average Speed
Higher is better ↑| Position / Tire | Result | Gap to best |
|---|---|---|
| 73.3 mph | Best | |
| 73.1 mph | -0.2 mph | |
| 73.0 mph | -0.3 mph | |
| 72.9 mph | -0.4 mph | |
| 72.8 mph | -0.5 mph | |
| 72.7 mph | -0.6 mph | |
| 72.6 mph | -0.7 mph | |
| 72.6 mph | -0.7 mph | |
| 72.6 mph | -0.7 mph | |
| 72.3 mph | -1.0 mph | |
| 72.3 mph | -1.0 mph | |
| 72.3 mph | -1.0 mph | |
| 72.3 mph | -1.0 mph | |
| 72.2 mph | -1.1 mph | |
| 72.1 mph | -1.2 mph | |
| 72.0 mph | -1.3 mph | |
| 71.9 mph | -1.4 mph | |
| 71.8 mph | -1.5 mph | |
| 71.8 mph | -1.5 mph | |
| 71.6 mph | -1.7 mph |
All the tires in the Dry Handling test finished less than 3% apart.

Wet
3Wet Braking
Wet braking in feet
Lower is better ↓| Position / Tire | Result | Gap to best |
|---|---|---|
| 94 ft | Best | |
| 94 ft | 0 ft | |
| 95 ft | +1 ft | |
| 95 ft | +1 ft | |
| 97 ft | +3 ft | |
| 97 ft | +3 ft | |
| 98 ft | +4 ft | |
| 99 ft | +5 ft | |
| 101 ft | +7 ft | |
| 101 ft | +7 ft | |
| 102 ft | +8 ft | |
| 103 ft | +9 ft | |
| 104 ft | +10 ft | |
| 104 ft | +10 ft | |
| 105 ft | +11 ft | |
| 105 ft | +11 ft | |
| 105 ft | +11 ft | |
| 108 ft | +14 ft | |
| 108 ft | +14 ft | |
| 109 ft | +15 ft |
The difference between best and worst was 15.7% (15 ft ≈ 1 Car Lengths).
Wet Handling
Wet Handling Average Speed
Higher is better ↑| Position / Tire | Result | Gap to best |
|---|---|---|
| 47.5 mph | Best | |
| 47.2 mph | -0.3 mph | |
| 47.0 mph | -0.5 mph | |
| 46.5 mph | -1.0 mph | |
| 46.4 mph | -1.1 mph | |
| 46.3 mph | -1.2 mph | |
| 46.2 mph | -1.3 mph | |
| 46.0 mph | -1.5 mph | |
| 45.9 mph | -1.6 mph | |
| 45.5 mph | -2.0 mph | |
| 45.5 mph | -2.0 mph | |
| 45.5 mph | -2.0 mph | |
| 45.4 mph | -2.1 mph | |
| 45.3 mph | -2.2 mph | |
| 45.2 mph | -2.3 mph | |
| 44.9 mph | -2.6 mph | |
| 44.9 mph | -2.6 mph | |
| 44.8 mph | -2.7 mph | |
| 44.7 mph | -2.8 mph | |
| 44.5 mph | -3.0 mph |
The difference between best and worst was 6.4% (3 mph).
Straight Aqua
Float Speed in mph
Higher is better ↑| Position / Tire | Result | Gap to best |
|---|---|---|
| 62.0 mph | Best | |
| 60.1 mph | -1.9 mph | |
| 59.7 mph | -2.3 mph | |
| 59.5 mph | -2.5 mph | |
| 59.4 mph | -2.6 mph | |
| 59.3 mph | -2.7 mph | |
| 59.1 mph | -2.9 mph | |
| 59.0 mph | -3.0 mph | |
| 59.0 mph | -3.0 mph | |
| 58.8 mph | -3.2 mph | |
| 58.7 mph | -3.3 mph | |
| 58.4 mph | -3.6 mph | |
| 58.3 mph | -3.7 mph | |
| 57.4 mph | -4.6 mph | |
| 57.3 mph | -4.7 mph | |
| 57.0 mph | -5.0 mph | |
| 57.0 mph | -5.0 mph | |
| 56.6 mph | -5.4 mph | |
| 56.4 mph | -5.6 mph | |
| 56.4 mph | -5.6 mph |
The difference between best and worst was 9% (5.6 mph).
Comfort
2Subj. Comfort
Subjective Comfort Score
Higher is better ↑| Position / Tire | Result | Gap to best |
|---|---|---|
| 9 Points | Best | |
| 8 Points | -1.00 Points | |
| 7 Points | -2.00 Points | |
| 7 Points | -2.00 Points | |
| 7 Points | -2.00 Points | |
| 7 Points | -2.00 Points | |
| 7 Points | -2.00 Points | |
| 7 Points | -2.00 Points | |
| 7 Points | -2.00 Points | |
| 7 Points | -2.00 Points | |
| 6 Points | -3.00 Points | |
| 6 Points | -3.00 Points | |
| 6 Points | -3.00 Points | |
| 6 Points | -3.00 Points | |
| 5 Points | -4.00 Points | |
| 5 Points | -4.00 Points | |
| 5 Points | -4.00 Points | |
| 5 Points | -4.00 Points | |
| 5 Points | -4.00 Points | |
| 2 Points | -7.00 Points |
The difference between best and worst was 77.8% (7 Points).
Noise
External noise in dB
Lower is better ↓| Position / Tire | Result | Gap to best |
|---|---|---|
| 71.3 dB | Best | |
| 71.4 dB | +0.10 dB | |
| 71.5 dB | +0.20 dB | |
| 71.6 dB | +0.30 dB | |
| 71.7 dB | +0.40 dB | |
| 71.8 dB | +0.50 dB | |
| 71.8 dB | +0.50 dB | |
| 71.9 dB | +0.60 dB | |
| 72.2 dB | +0.90 dB | |
| 72.2 dB | +0.90 dB | |
| 72.3 dB | +1.00 dB | |
| 72.6 dB | +1.30 dB | |
| 72.6 dB | +1.30 dB | |
| 72.6 dB | +1.30 dB | |
| 72.7 dB | +1.40 dB | |
| 73 dB | +1.70 dB | |
| 73 dB | +1.70 dB | |
| 73.5 dB | +2.20 dB | |
| 74.1 dB | +2.80 dB | |
| 75 dB | +3.70 dB |
The difference between best and worst was 5.2% (3.7 dB).
Value
3Wear
Predicted tread life in KM
Higher is better ↑| Position / Tire | Result | Gap to best |
|---|---|---|
| 33,685 miles | Best | |
| 31,746 miles | -1,939 miles | |
| 31,504 miles | -2,181 miles | |
| 27,868 miles | -5,817 miles | |
| 25,930 miles | -7,755 miles | |
| 25,706 miles | -7,979 miles | |
| 25,687 miles | -7,998 miles | |
| 25,203 miles | -8,482 miles | |
| 24,476 miles | -9,209 miles | |
| 24,265 miles | -9,420 miles | |
| 23,991 miles | -9,694 miles | |
| 23,749 miles | -9,936 miles | |
| 23,264 miles | -10,421 miles | |
| 22,295 miles | -11,390 miles | |
| 22,295 miles | -11,390 miles | |
| 22,052 miles | -11,633 miles | |
| 22,052 miles | -11,633 miles | |
| 18,902 miles | -14,783 miles | |
| 17,448 miles | -16,237 miles | |
| 16,479 miles | -17,206 miles |
The difference between best and worst was 51.1% (17,206 miles).
Value
Euros/1000km based on cost/wear
Lower is better ↓| Position / Tire | Result | Gap to best | cost per 1,000 miles |
|---|---|---|---|
| 6.47 Price/1000 | Best | €22.73 | |
| 8.09 Price/1000 | +1.62 Price/1000 | €19.43 | |
| 8.38 Price/1000 | +1.91 Price/1000 | €24.66 | |
| 8.45 Price/1000 | +1.98 Price/1000 | €22.34 | |
| 8.76 Price/1000 | +2.29 Price/1000 | €28.24 | |
| 8.77 Price/1000 | +2.30 Price/1000 | €26.13 | |
| 9.11 Price/1000 | +2.64 Price/1000 | €28.36 | |
| 9.19 Price/1000 | +2.72 Price/1000 | €28.81 | |
| 9.32 Price/1000 | +2.85 Price/1000 | €40.61 | |
| 9.4 Price/1000 | +2.93 Price/1000 | €30.43 | |
| 9.48 Price/1000 | +3.01 Price/1000 | €26.64 | |
| 9.59 Price/1000 | +3.12 Price/1000 | €18.28 | |
| 9.59 Price/1000 | +3.12 Price/1000 | €29.54 | |
| 9.72 Price/1000 | +3.25 Price/1000 | €19.95 | |
| 10.28 Price/1000 | +3.81 Price/1000 | €30.90 | |
| 11.04 Price/1000 | +4.57 Price/1000 | €37.66 | |
| 11.43 Price/1000 | +4.96 Price/1000 | €30.55 | |
| 11.83 Price/1000 | +5.36 Price/1000 | €40.79 | |
| 12.07 Price/1000 | +5.60 Price/1000 | €43.92 | |
| 12.26 Price/1000 | +5.79 Price/1000 | €38.64 |
The difference between best and worst was 89.5% (5.79 Price/1000). Over 25,000 miles the cheapest tire to own (Bridgestone Turanza T005) works out €641 cheaper than the most expensive (Kumho Ecsta PS71).
How this is calculated
Assumes a typical car doing 29 mpg (rolling resistance causing 20% of fuel use), fuel at €6.25 per gallon and €70 fitting per set of four. Purchase prices are from the time of the 2019 test; financing costs are excluded.
Rolling Resistance
Rolling resistance in kg t
Lower is better ↓| Position / Tire | Result | Gap to best | Extra fuel / year |
|---|---|---|---|
| 7.49 kg/t | Best | $0 | |
| 7.69 kg/t | +0.20 kg/t | $8 | |
| 8.23 kg/t | +0.74 kg/t | $29 | |
| 8.47 kg/t | +0.98 kg/t | $38 | |
| 8.97 kg/t | +1.48 kg/t | $58 | |
| 8.99 kg/t | +1.50 kg/t | $59 | |
| 9.08 kg/t | +1.59 kg/t | $62 | |
| 9.09 kg/t | +1.60 kg/t | $63 | |
| 9.22 kg/t | +1.73 kg/t | $68 | |
| 9.43 kg/t | +1.94 kg/t | $76 | |
| 9.48 kg/t | +1.99 kg/t | $78 | |
| 9.48 kg/t | +1.99 kg/t | $78 | |
| 9.49 kg/t | +2.00 kg/t | $78 | |
| 9.61 kg/t | +2.12 kg/t | $83 | |
| 9.8 kg/t | +2.31 kg/t | $91 | |
| 10.27 kg/t | +2.78 kg/t | $109 | |
| 10.29 kg/t | +2.80 kg/t | $110 | |
| 10.67 kg/t | +3.18 kg/t | $125 | |
| 11.06 kg/t | +3.57 kg/t | $140 | |
| 11.49 kg/t | +4.00 kg/t | $157 |
The difference between best and worst was 53.4% (4 kg / t). Over 12,000 miles a year at $3.60/gal, the Vredestein Ultrac Vorti uses about 44 gal ($157) more fuel than the Bridgestone Turanza T005.
Adjust the assumptions
Calculated estimates, not additional measurements. Use the controls to explore the assumptions. These calculators use the full test field, independently of your tire selection above.
More tire tests
Cross-check this test
Where these tires were tested again, and how the verdict held up.
2019 Summer 53 Tire Braking Shootout
225/45 R1745 tires tested
20 of these 20 tires tested again
2020 Tire Market Overview Braking Test
245/45 R1849 tires tested
15 of these 20 tires tested again
2020 Auto Bild Summer Tire Test
245/45 R1820 tires tested
13 of these 20 tires tested again
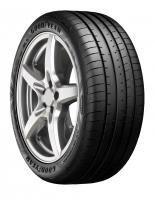
Continental Premium Contact 6 / Goodyear Eagle F1 Asymmetric 5
This test’s winner finished 3rd there